Managing Licenses
Set a permanent password for hassle-free logins
We understand that some customers may prefer a more convenient login method by setting a permanent password instead of receiving a login link each time.
- You can easily achieve this after your first login by following these steps:
Visit our customer portal by clicking on the following link to access the Customer Portal
Enter the email associated with your account. We will send you a one-time password to that email.
Log in using the provided one-time password.
Once logged in, click on “Account Information” in the menu.
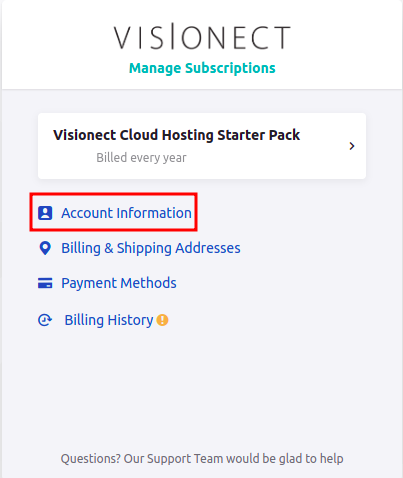
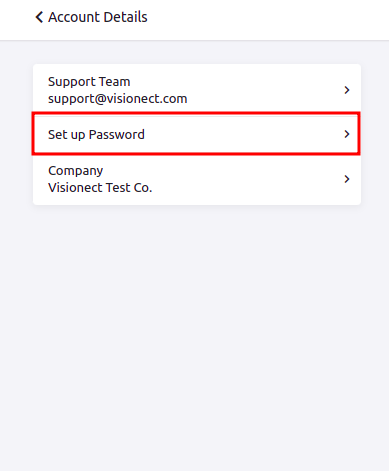
In the account information section, you will find three options. Choose “Set up password” to proceed.
Enter the new password according to the guidelines written below.
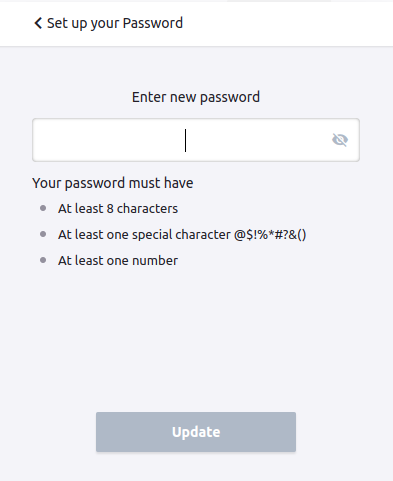
After entering the password, click on “Update” to save your new permanent password.
Great! From now on, you can effortlessly log in using your newly set password. If you have any further questions or need assistance, please don’t hesitate to reach out to our support team.
Update your payment information
You can easily add or update your payment information directly through the Chargebee dashboard.
- To update your payment information, please follow these steps:
Visit our customer portal by clicking on the following link to access the Customer Portal
Enter the email associated with your account. We will send you a one-time password to that email.
Log in using the provided one-time password.
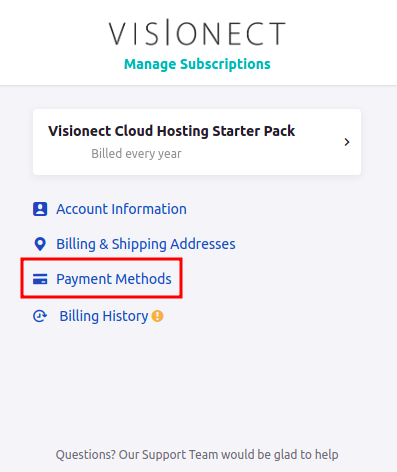
Once logged in, click on “Payment Methods” in the menu.
Here, you can easily add or modify your payment information. You can update your First Name, Last Name, Card information (Card number, Expiry, CVV), as well as your address and country.
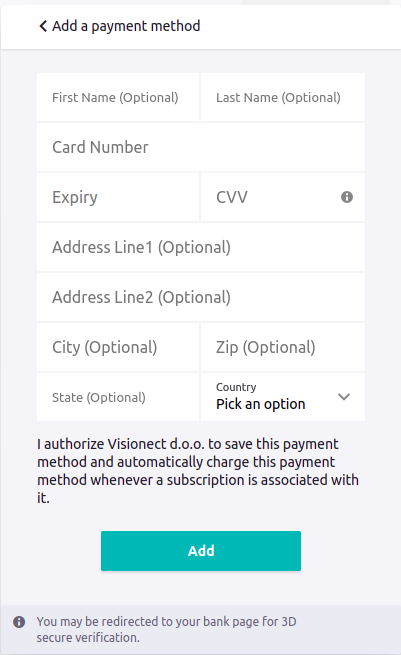
After making the necessary changes, simply click on “Add” to save your updated payment information.
That’s it! Your payment information has been successfully updated. If you have any further questions or need assistance, please don’t hesitate to contact our support team.
Update your company information
- To update your company information, please follow these steps:
Visit our customer portal by clicking on the following link to access the Customer Portal
Enter the email associated with your account. We will send you a one-time password to that email.
Log in using the provided one-time password.
Once logged in, click on “Account Information” in the menu.
In the account information section, you will find three options. Choose “Company” to proceed.
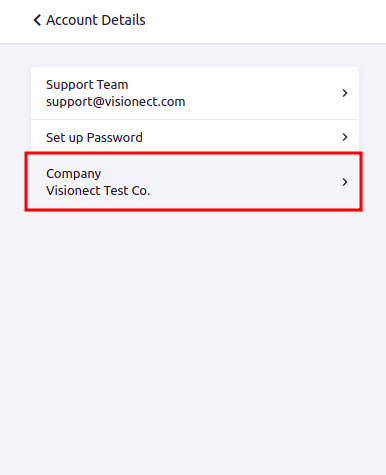
Here, you can update your associated First Name, Last Name, Email, Company name, and phone number.

After making the necessary changes, click on “Update” to save your updated company information.
That’s it! Your company information has been successfully updated. If you have any further questions or need assistance, please don’t hesitate to reach out to our support team.
Check billing history
- To check your billing history, please follow these steps:
Visit our customer portal by clicking on the following link to access the Customer Portal
Enter the email associated with your account. We will send you a one-time password to that email.
Log in using the provided one-time password.
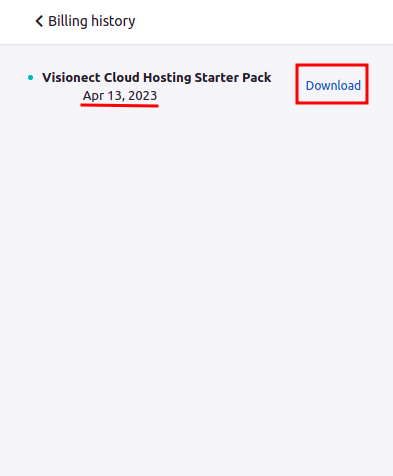
Once logged in, click on “Billing History” in the menu.
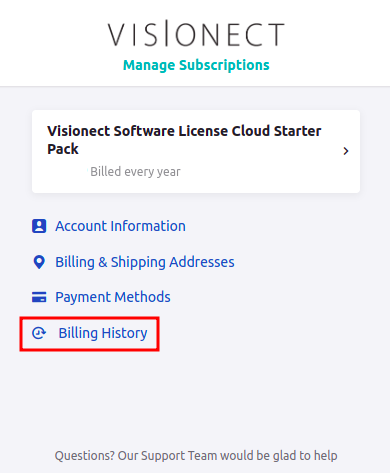
Here, you have easy access to your past invoices, including their generation dates, and the option to conveniently download them. You can also check the payment status of each invoice, ensuring you stay up-to-date on which ones have been paid.
That’s it! If you have any further questions or need assistance with the billing, please don’t hesitate to reach out to our support team.