Getting started with Place & Play CMS#
Developed on top of the Visionect Software Suite by Visionect and partners, this CMS seamlessly integrates with our Place & Play e-Paper displays. It’s an all-in-one solution, combining integrated e-Paper device management and content control.
To get started with using the Place & Play CMS, you will need to:
Update your user profile
Pair your device
Create the playlist
Schedule it to your device
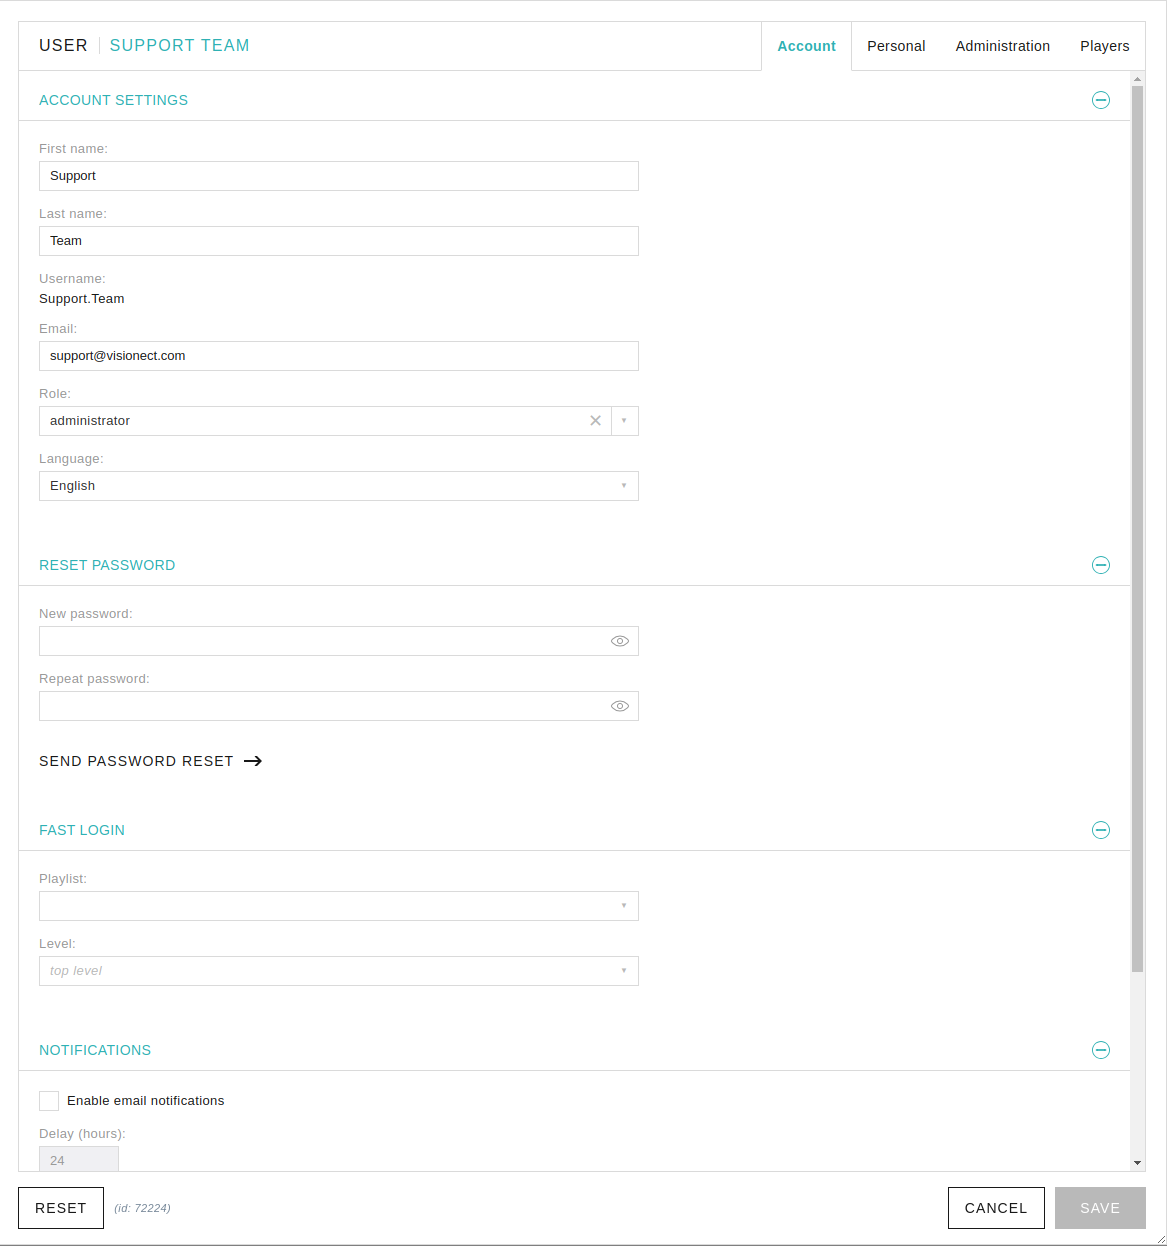
Update your user account#
Upon your first log in, you will be prompted to fill in your user profile in the My Profile window. To get the most out of the application, we strongly advise filling in the profile as completely as possible.
Pair your device#
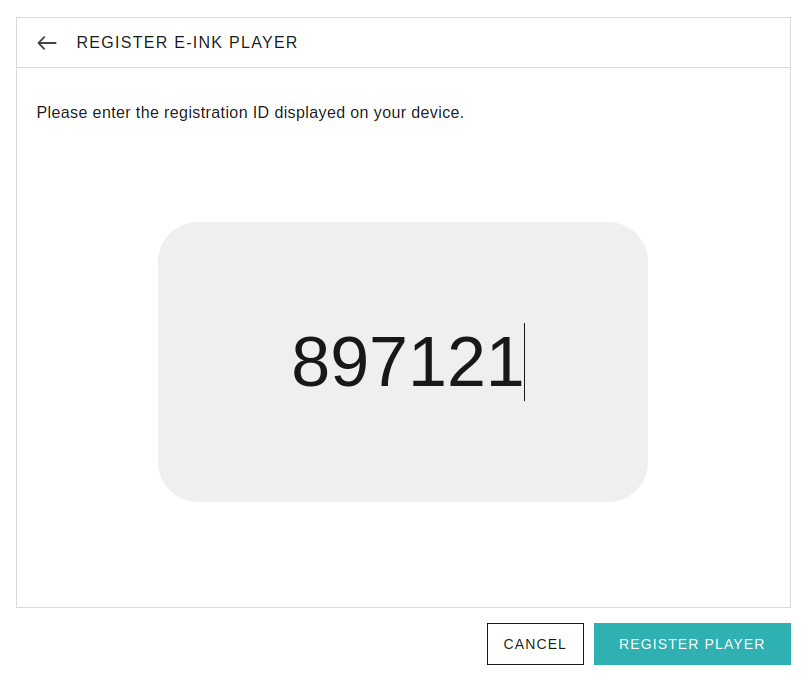
Once you have completed the initial configuration and your device has been successfully configured for the Place & Play CMS it will show a PIN code. This PIN code is mandatory to register the display in the CMS. It may take up to 15 minutes for the code to show up after successful configuration.
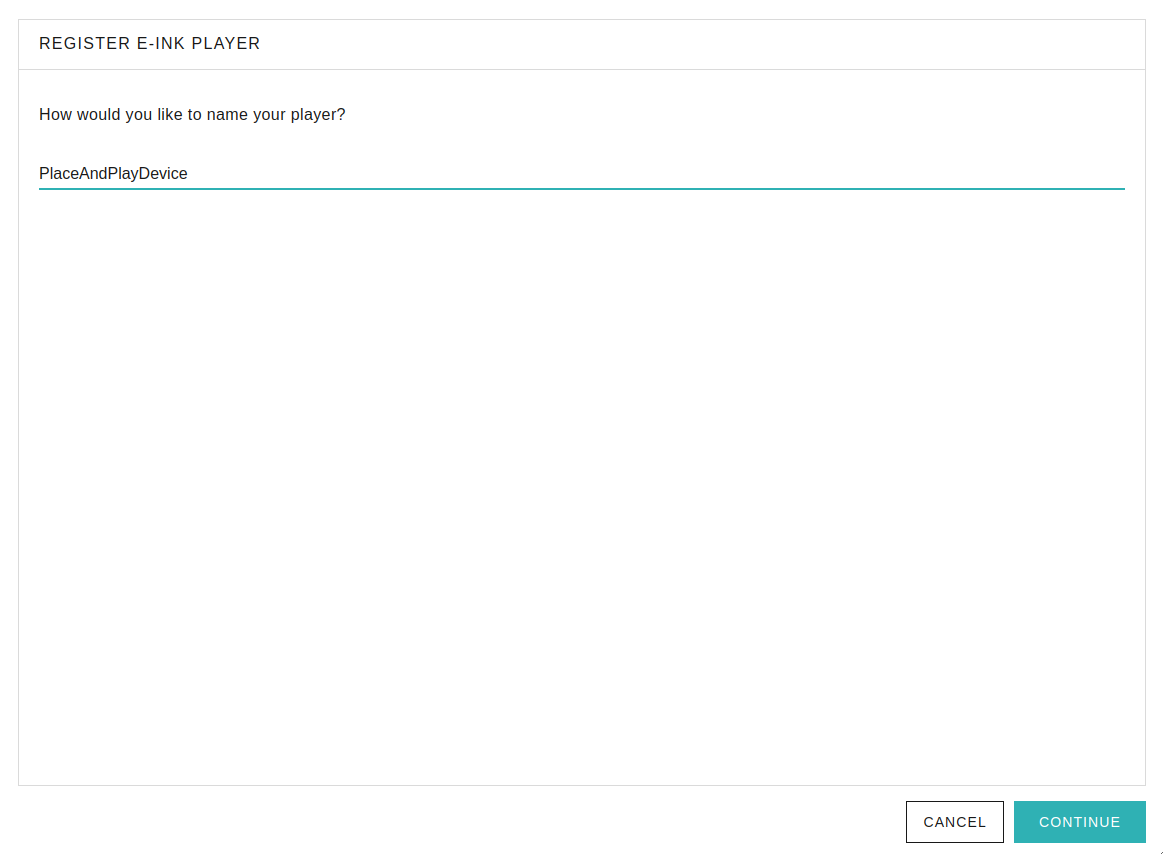
To add the Place & Play display to your CMS account go to Players and select Add Player. In the pop-up window follow these steps:
Enter the name of the player. Choose something descriptive as this device will be referred to by this name elsewhere in the CMS. Example: “Entrance”
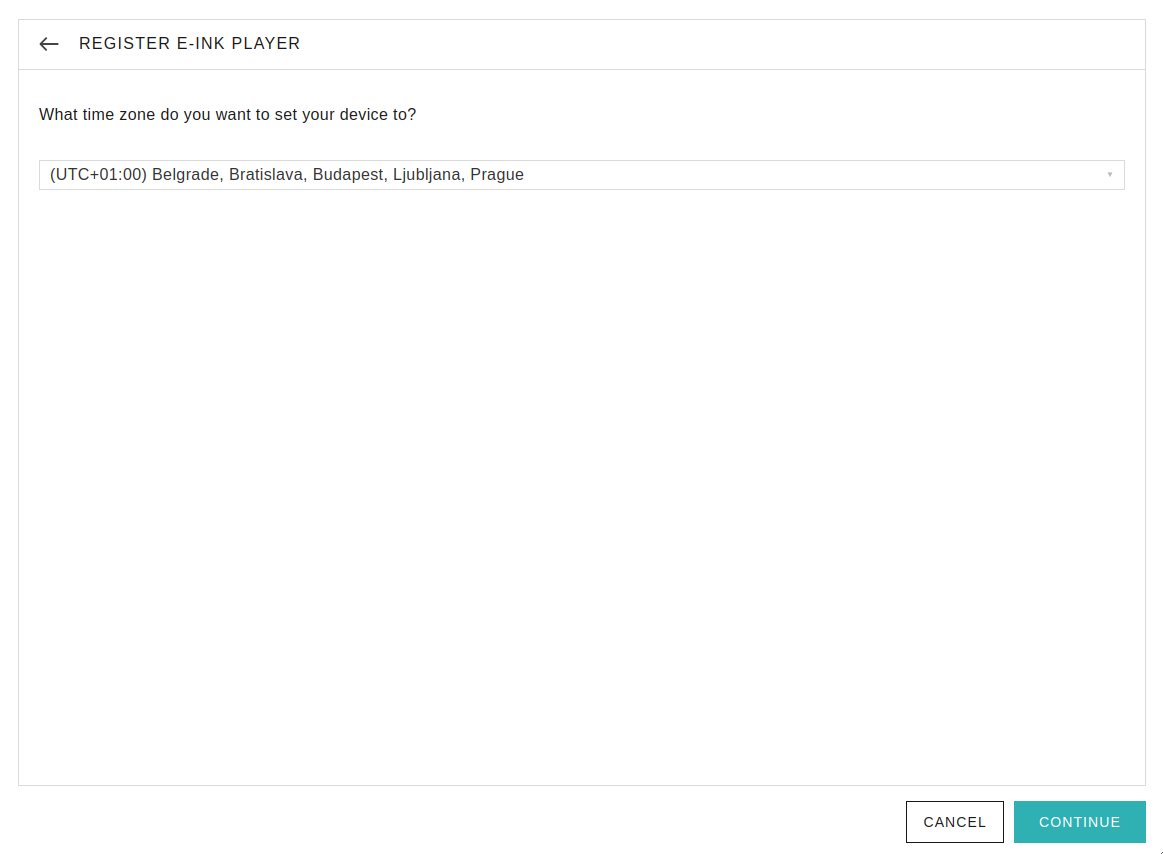
Set the time zone for this particular player. It is important to set the correct time zone as it is used to calculate the play times. The default time zone is GMT+1.
Type in the PIN code that is displayed on your Place & Play display
Click on Register Player.
When the player is registered it will display a blank screen with status notes on the bottom of the display. Now we can adjust its settings, add it to a group, and then assign a playlist.
Assign the player to a group#
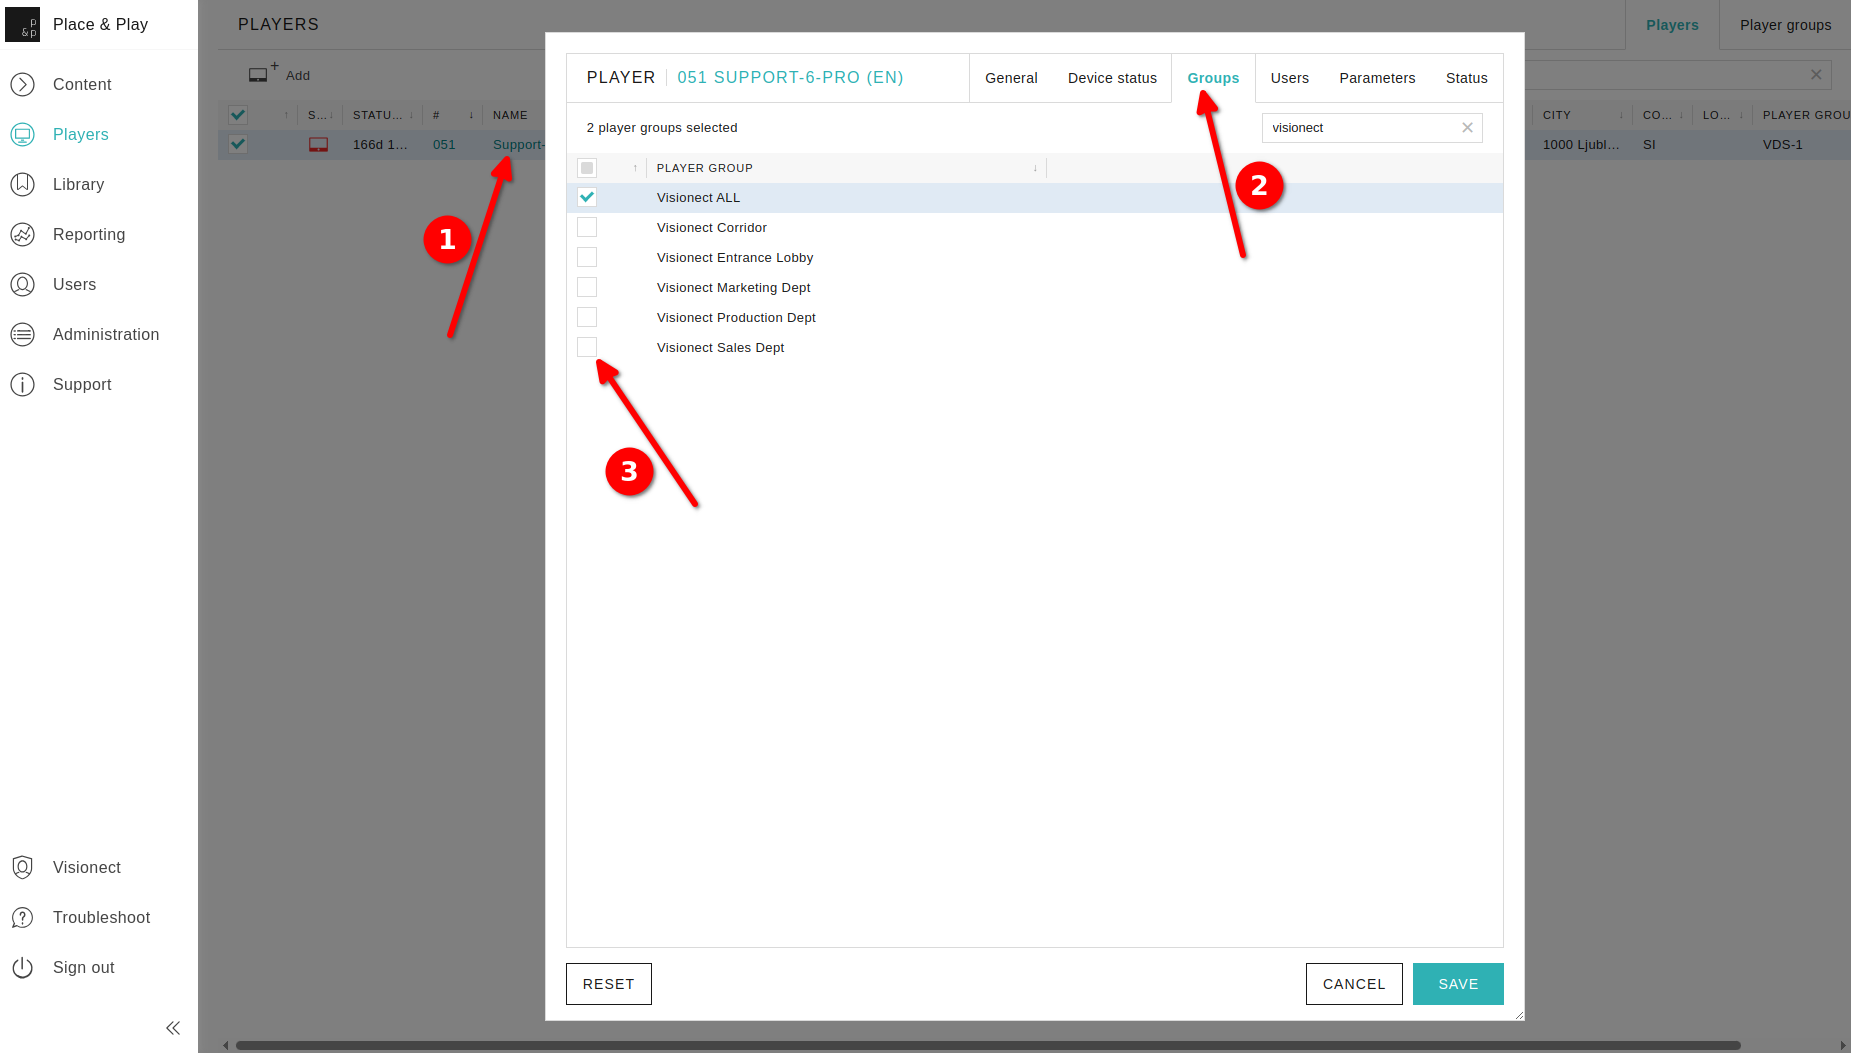
To assign the player to a group:
Click on your device in the Players tab
Navigate to Groups in the top menu
Assign the Player to one or multiple Player groups by selecting the checkbox(es).
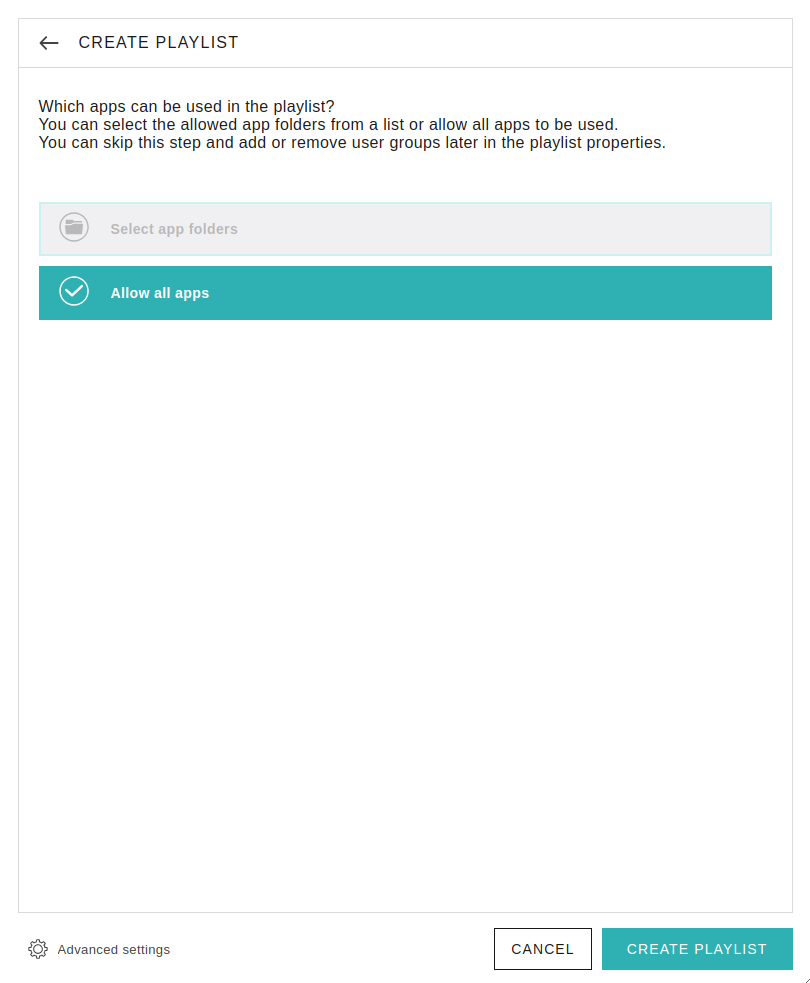
Create the playlist#
Once we have paired our device, now it is time to create our first playlist. To do so first navigate to Content –> Playlists.
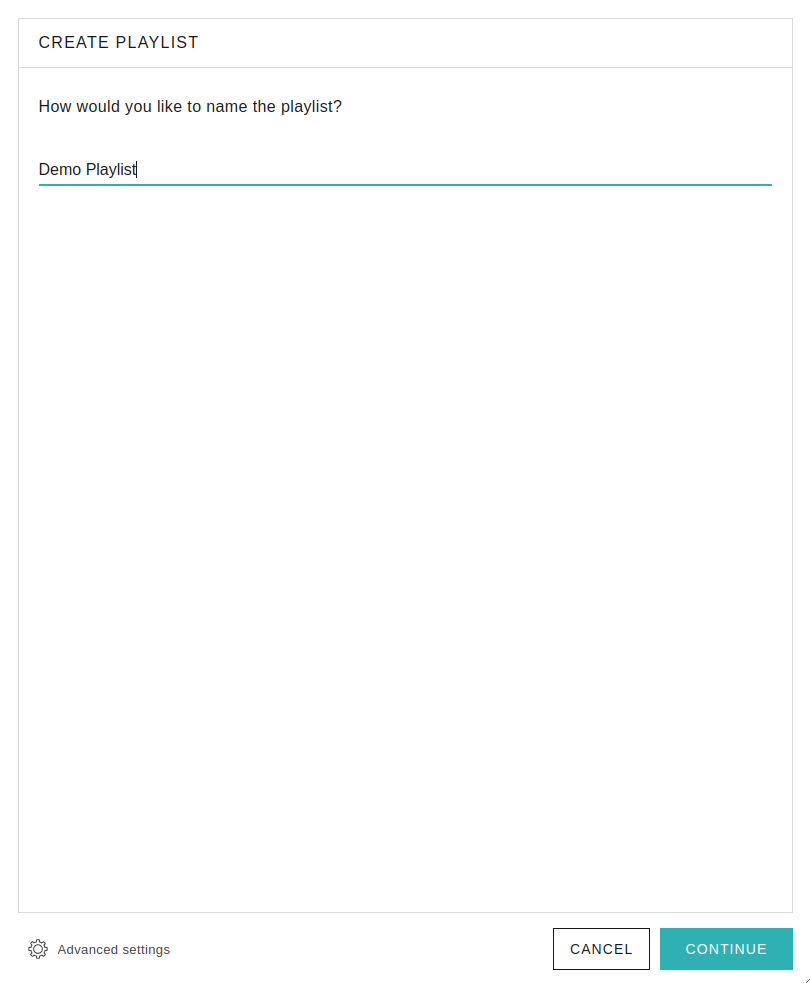
Click on Create Playlist.
Name your playlist.
Choose to allow changes on Player level or not. Changes on Player level are not available for E Ink devices

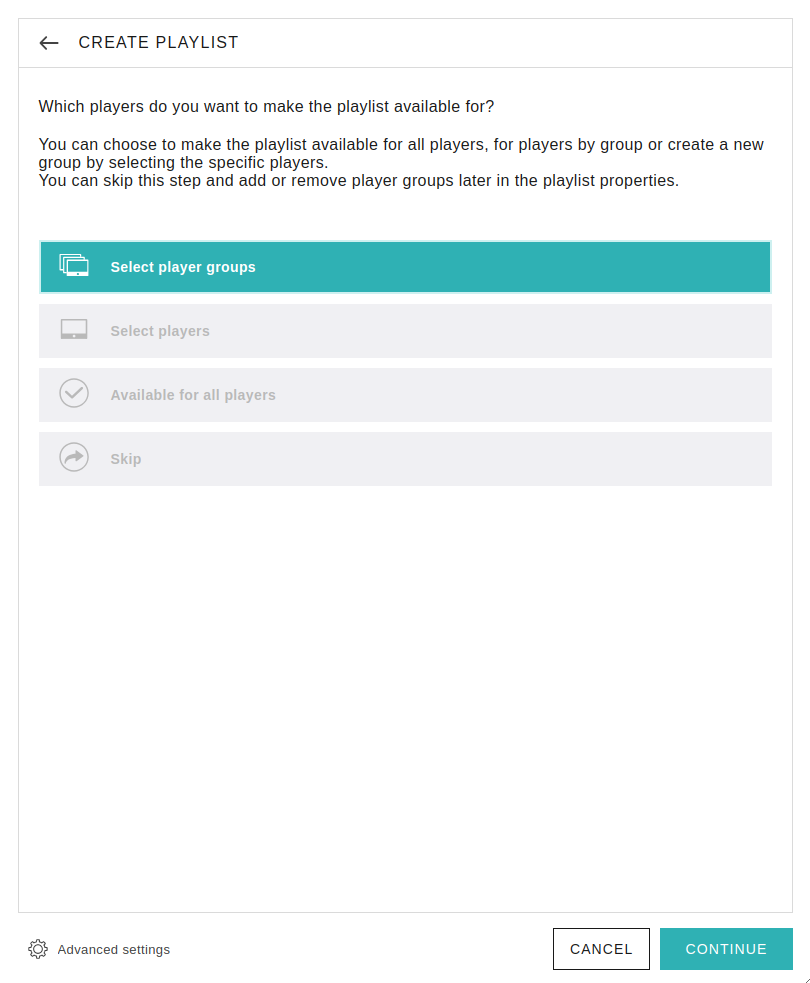
Choose Select Player groups and choose the player group you just created.
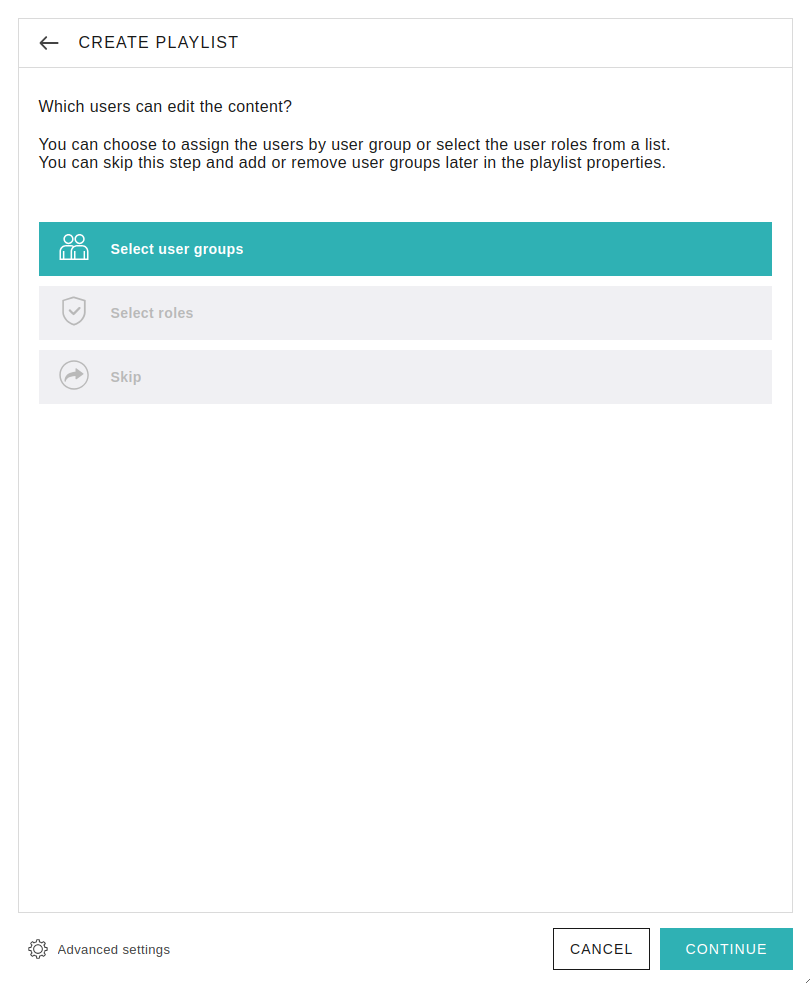
Choose Select User groups and choose the user group which will be able to edit the playlist.
Choose whether to select certain app folders or to assign all apps.
With this we have created our very own playlist. This playlist does not have any content in it yet, so to start creating the content for our devices:
Click Open Playlist
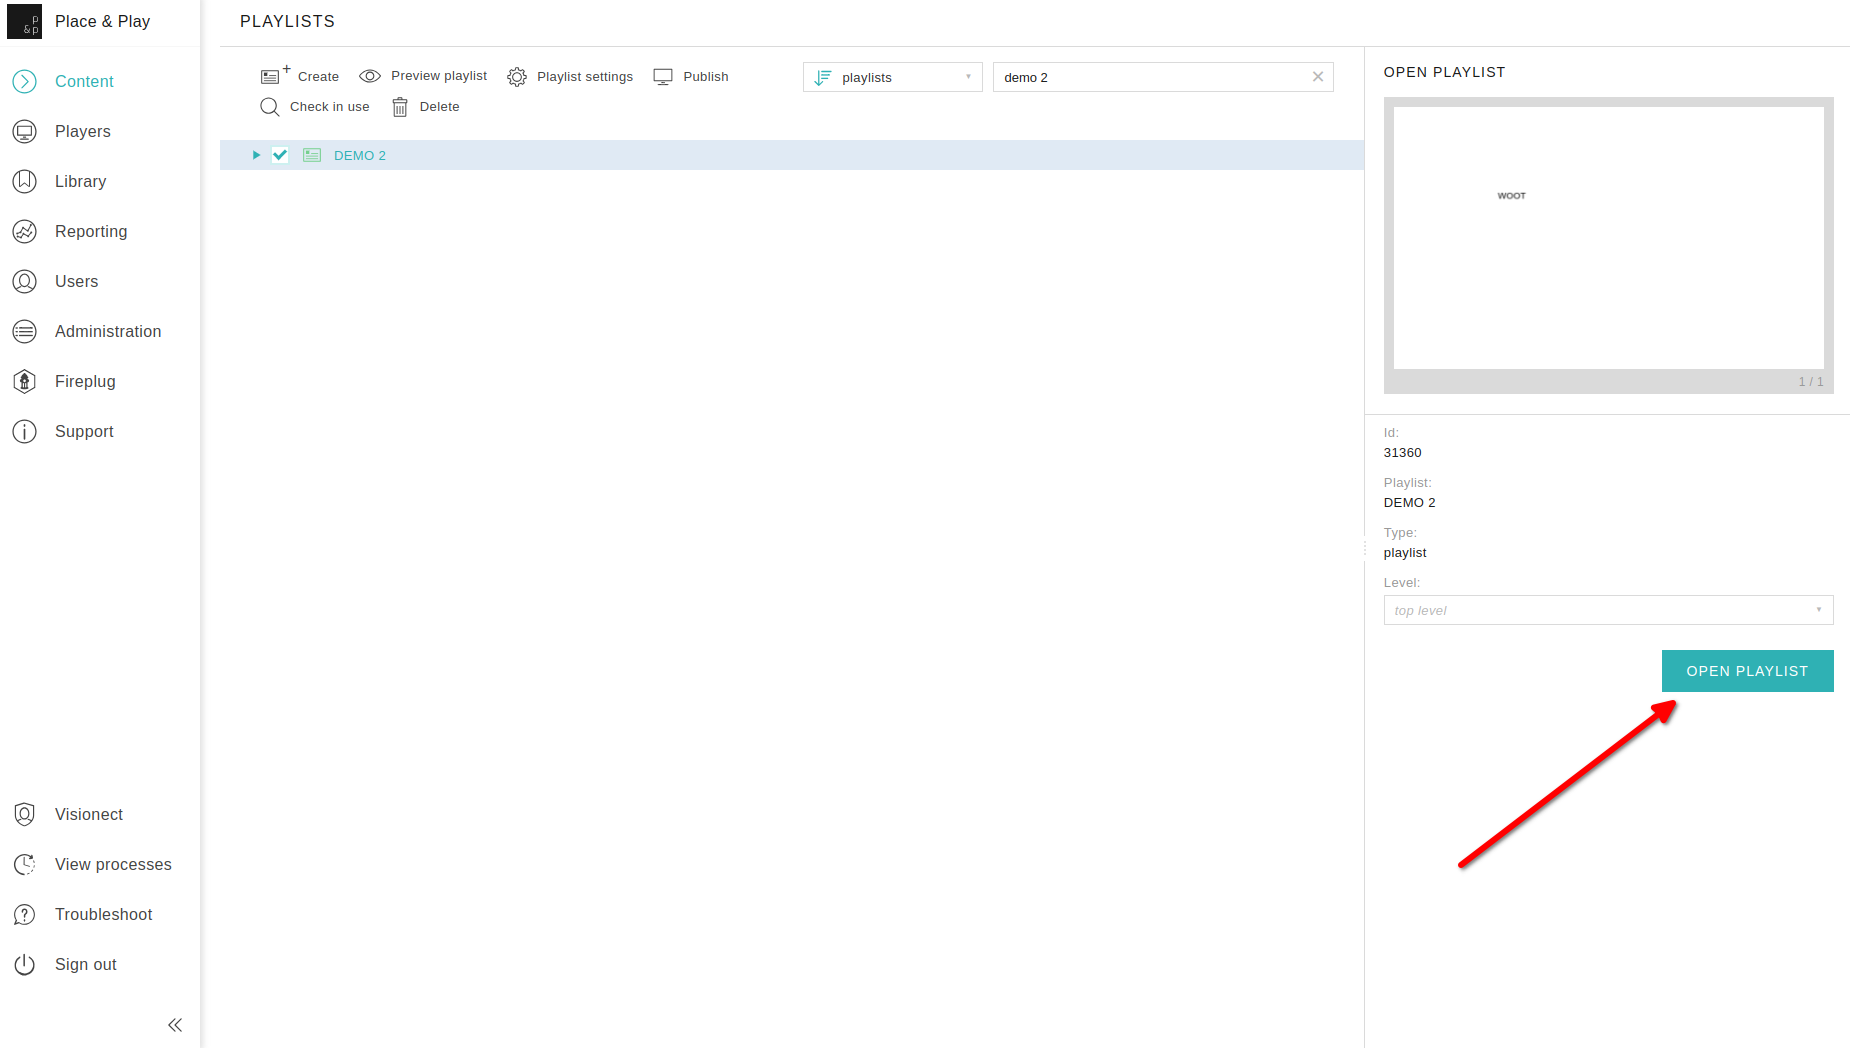
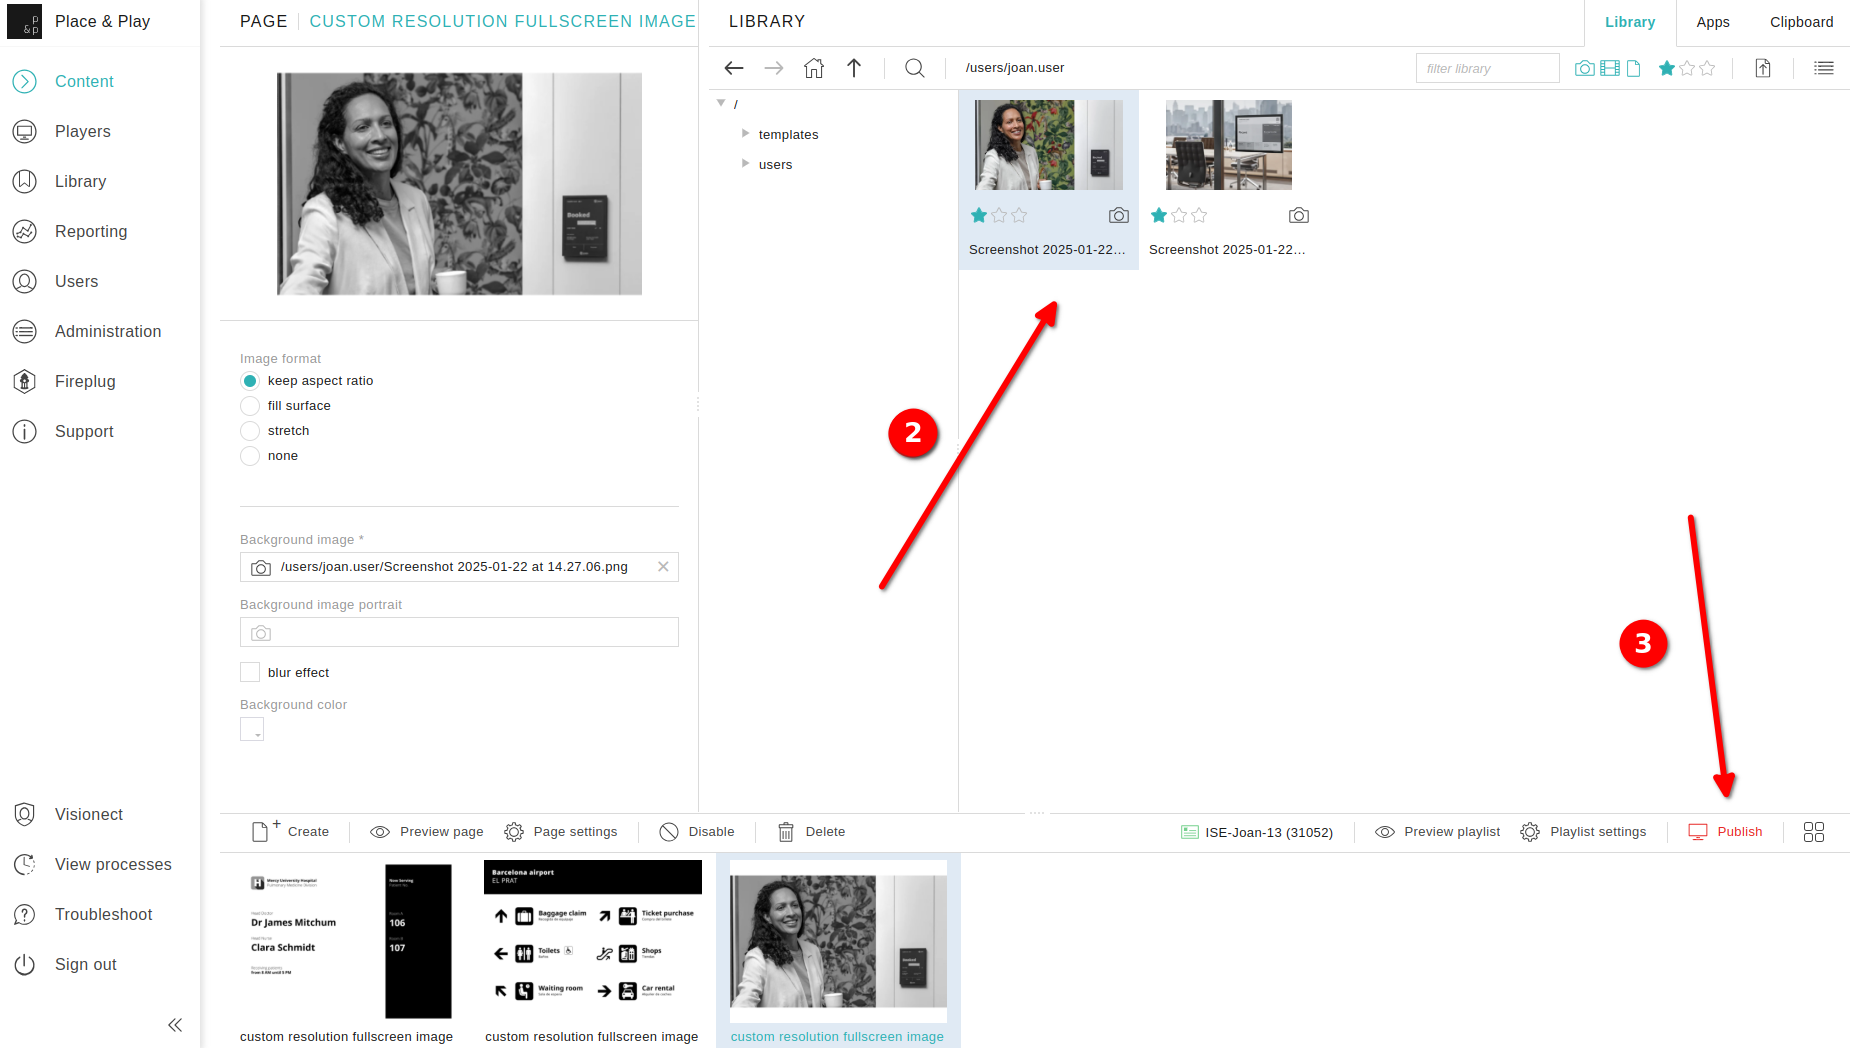
Edit the playlist by importing your images, or creating new pages
Once we are done editing, click Publish which will update the playlist with all the changes that were made
Schedule it to your device#
To schedule your newly created content to the device, first navigate to Content -> Scheduling.
Select the Player (on the left tab) for which you wish to create a Schedule.
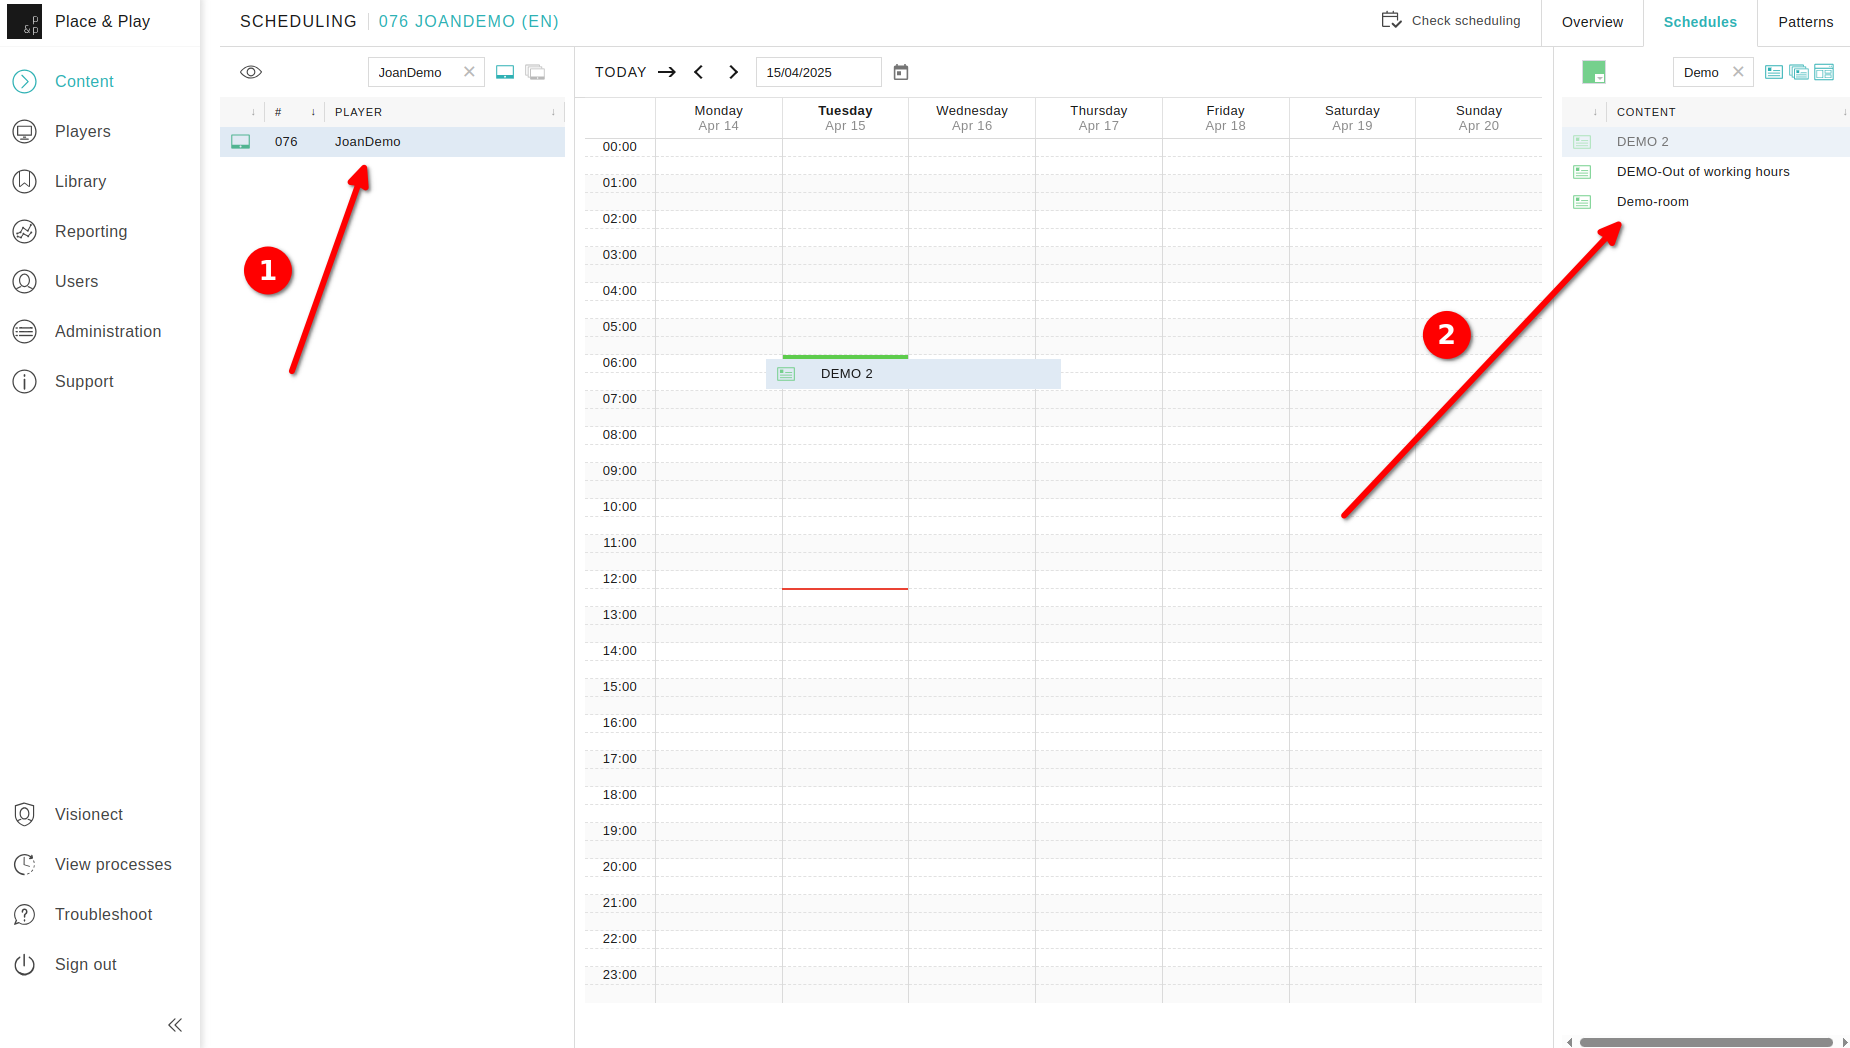
Drag and drop the Playlist (from the right tab) to the Schedule calendar.
The Create Schedule window opens.
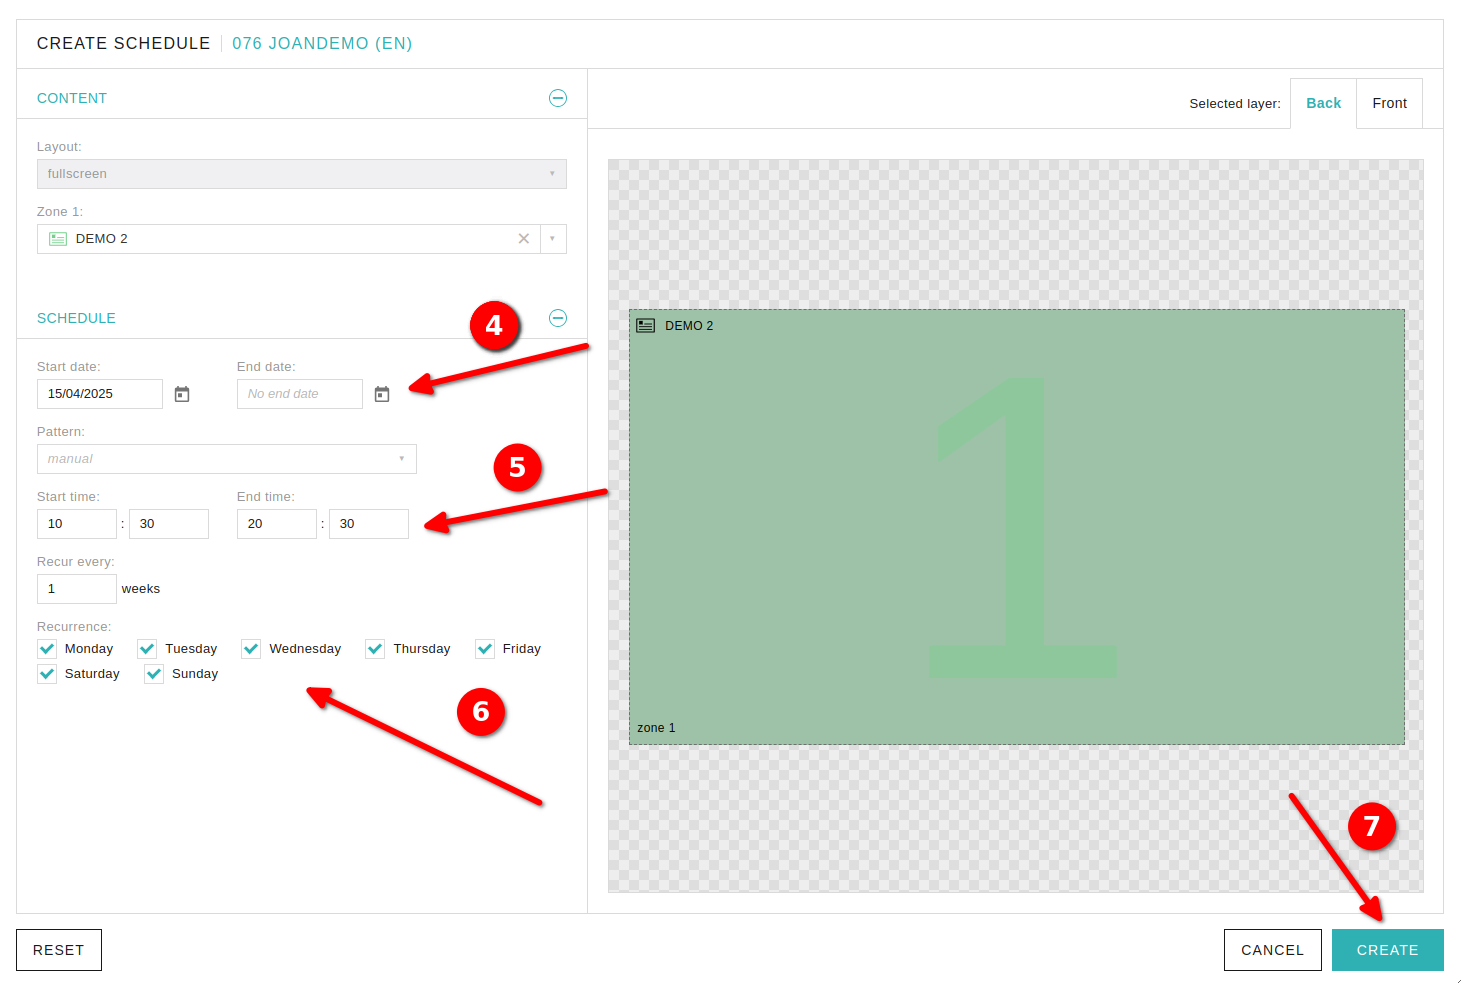
Select start and end date for your playlist
Select start and end time in the day for your playlist
Select the recurrence of your playlist
Click Create and that is it! Your content should start playing on your device in a couple of minutes.