Run the Visionect Configurator
Basic configuration
- Connect the device to Wi-Fi:
With Wi-Fi connections, type in the name of your Wi-Fi or scan for existing networks, and then select your encryption type.
- Open networks: The device will connect automatically.
- Encrypted networks (WPA2-PSK): Enter the password of your wireless network.
- Enterprise security networks (WPA2-EAP): Enter the password of your wireless network. Next, enter the RADIUS username and password and upload the necessary certificates.
Please note that the Wi-Fi password is limited to 31 characters only.
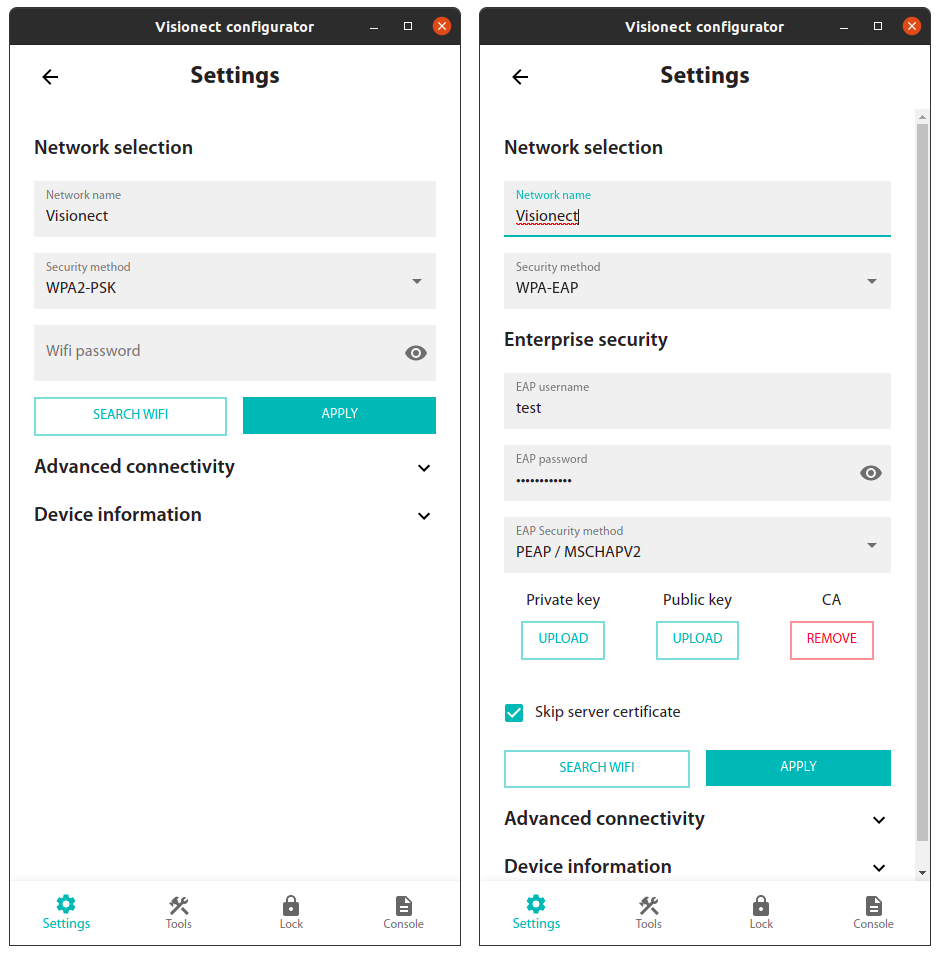
Connecting a Visionect device to a secured Wi-Fi (left: WPA2, right: EAP).
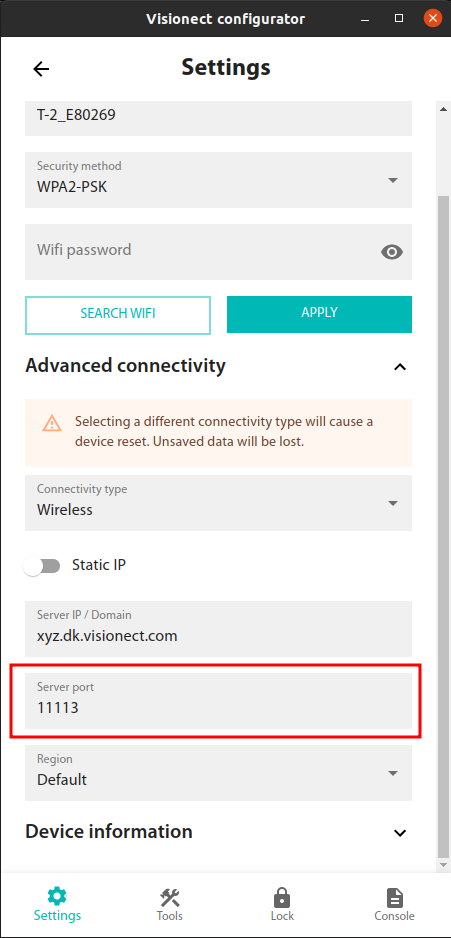
- Next, configure your device hosting by entering the address of the server on which your device is going to run. Your IP address will be obtained automatically. Ensure that the Server port is configured to 11113, as it is the designated port utilized by the devices to establish a connection with the server.
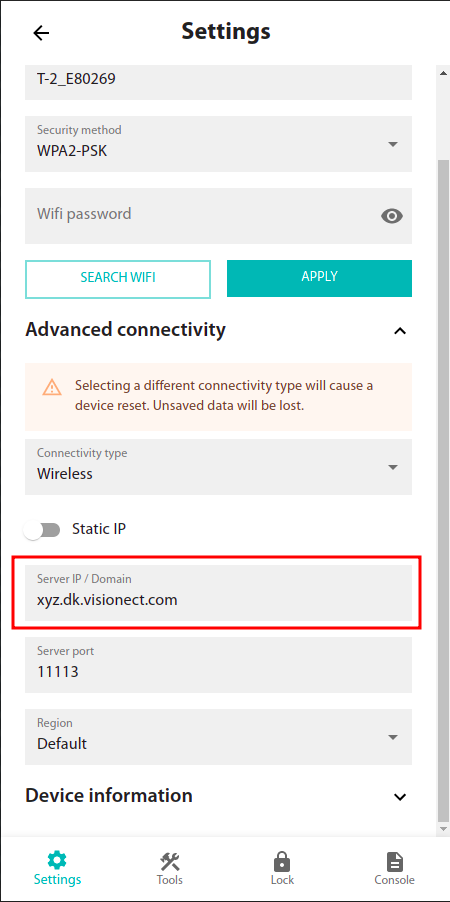
Setting the server address of a Visionect device.
Note
A license is needed for every device. One month of free license is included with every purchase. When the free period expires, you can renew the Cloud license or choose the Essential license and set up your own server. For more details visit our website here.
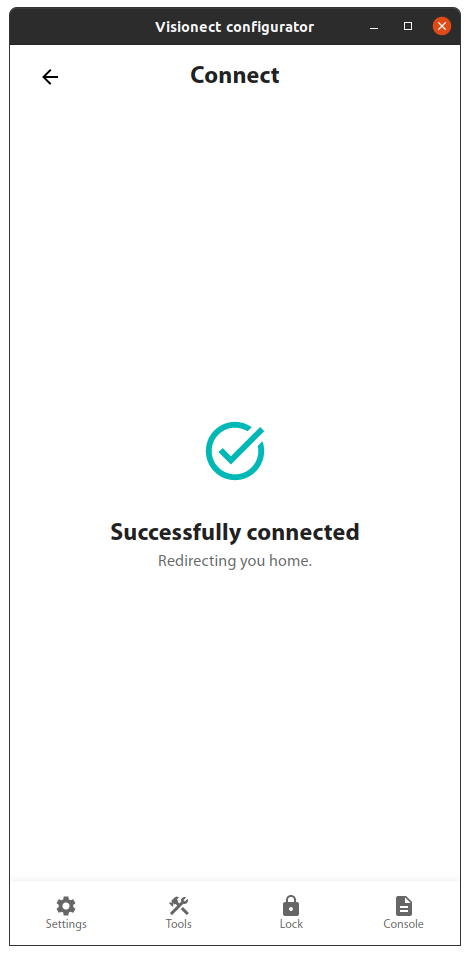
- By clicking ‘Apply’, your device will connect.
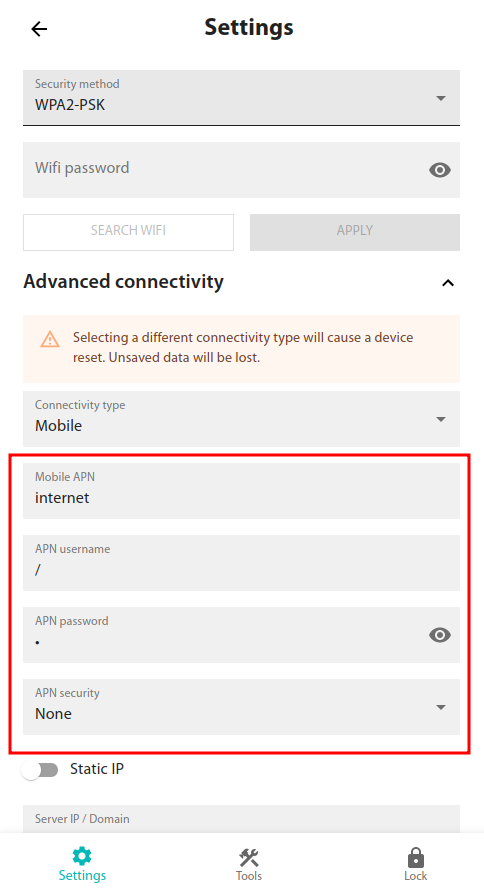
SIM (4G) configuration
- Under Advanced connectivity options in the Visionect Configurator, in the Connectivity type section, select Mobile. The device will reboot, to set a different connectivity module.
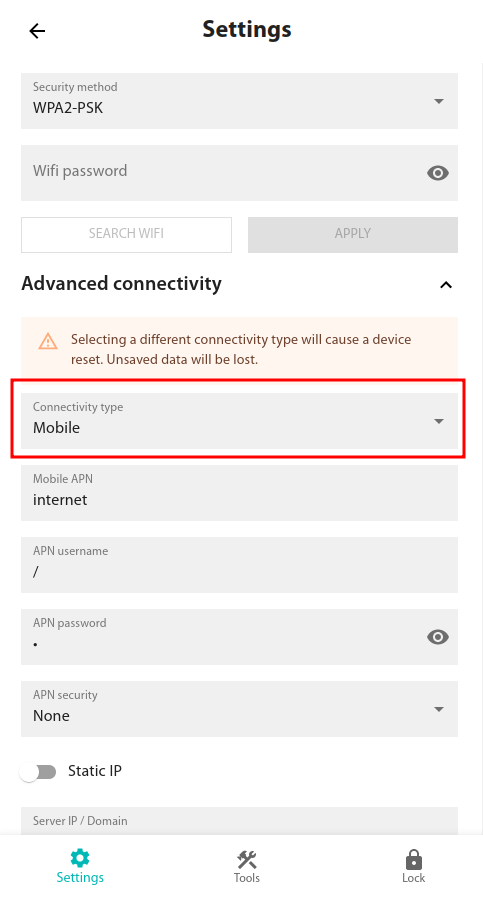
- After the reboot, once again we go to Advanced connectivity where more fields will be presented to set the configuration for the SIM. Now you need to enter the APN (Access Point Name) details for your network carrier. This information can typically be found on the carrier’s website or by contacting their customer support.
- Next, you’ll need to enter the security details, which could be PAP (Password Authentication Protocol) or CHAP (Challenge Handshake Authentication Protocol) or if not needed set to None.
- Enter the username and password for your network carrier. Again, this information can be found on their website or by contacting customer support. If it is not needed in case of None security, leave the fields blank.
- Once you’ve entered all the necessary details, click on the “Apply” button to save your changes. Make sure to follow Basic configuration from step 2, after setting the device to use the SIM module.
By following these steps, you should be able to successfully select the SIM connectivity for your device and get it connected to the network.
Advanced configuration
For advanced hosting configuration, change the port of your server by clicking on the gear icon below the server address. You can now set a default server port or enter a custom port address. Click ‘Accept’ to return to the main Configurator screen.
Change the port on the Visionect Configurator. You can choose between a default and custom port.
Normally, the Visionect Configurator will obtain your IP address automatically. However, you can change the device network settings by clicking the gear icon below the automatic IP address. You can now change your IP address, subnet mask, gateway and DNS server. Click ‘Accept’ to return to the main Configurator screen.
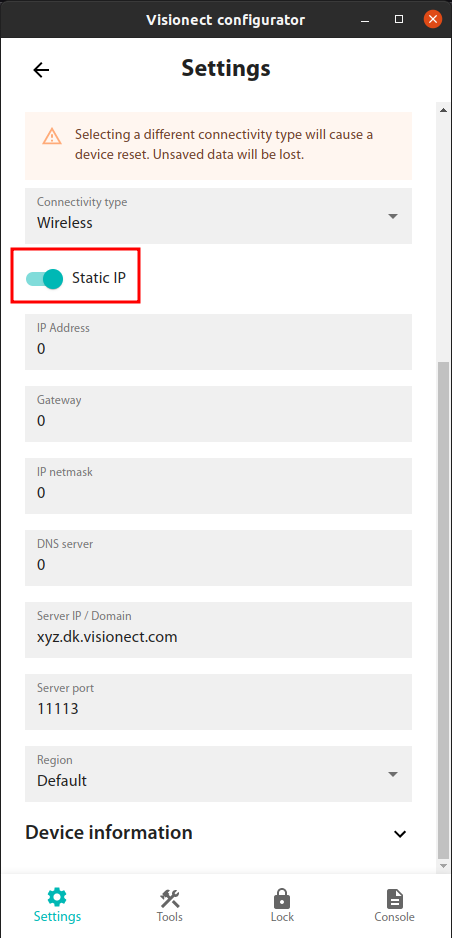
Change the IP, Subnet mask, Gateway, and DNS on the Visionect Configurator. You can choose between DHCP or setting them manually.
For advanced device configuration, access the command line interface (CLI) by clicking the ‘Console’ button. Read more about CLI configuration here.
Warning
Some devices might stop operating after being connected to the Visionect Configurator a while. Nothing is wrong with the device; it might have simply entered ‘soft sleep’. This is a power save mode meant to conserve power, which activates after 15 seconds of physical inactivity (as detected by the accelerometer).
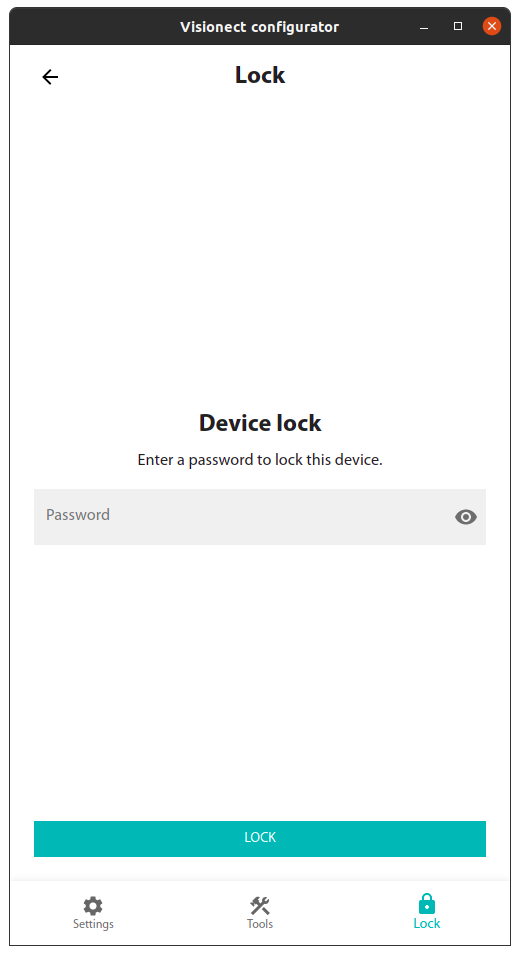
Secure your device with a password
Protect your device by enabling a lock that allows access only through Visionect Configurator or CLI after entering the password.
- To lock your device with a password, please follow these instructions:
Open the Visionect Configurator and locate your device.
Once the configuration screen loads, find the menu and click on the “Lock” button.

Enter an 8-character password on the screen that appears and click on “Lock” to activate the device lock. Please note that the password must be at least 8 characters long for security reasons.
Remember, each time you unlock the device, it will remain unlocked until you lock it again using the same procedure.