User Management#
Users#
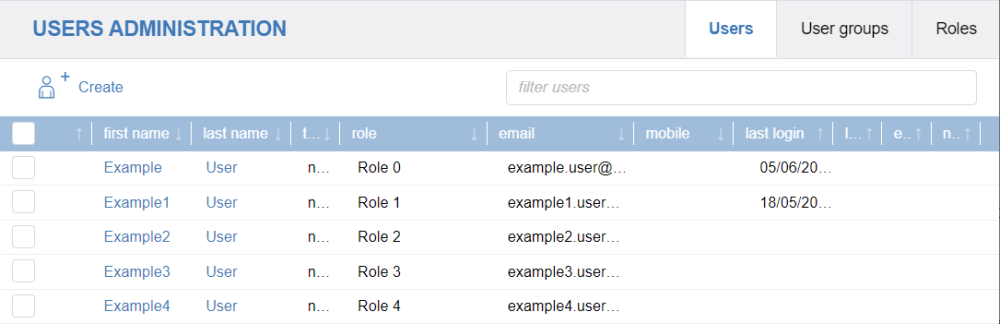
Go to the menu Users and open the Users tab. An overview of all Users is displayed. Use the search field Filter Users to easily find a User by name.
Creating users#
To create a new User, simply click on the Create button at the top left corner of the screen. Fill in the User information and click on the Create button.
User settings#
Account#
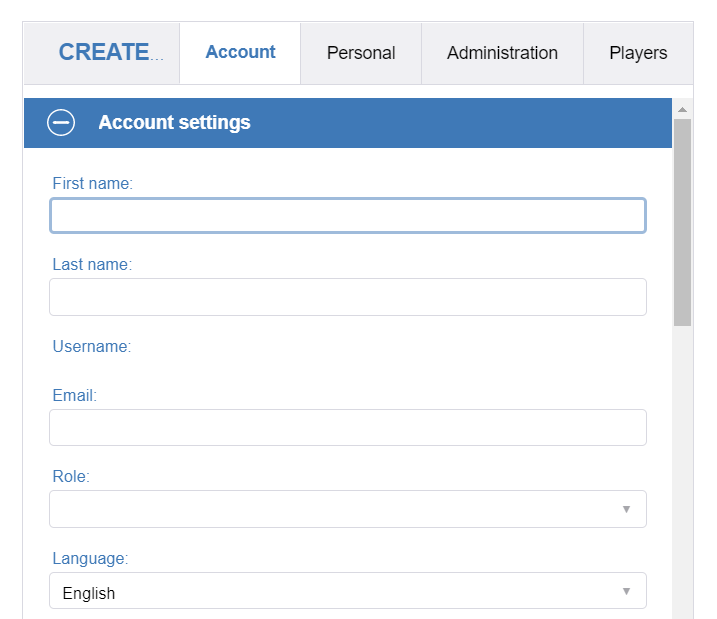
Certain User fields are required: first name, last name, email, password and repeat password. The Username is generated as ‘firstname.lastname’. If a User has no Role assigned, then the User will have no access to any of the role permissions. You can change the system language by selecting one, logging out, and logging back in. All available mailing lists are displayed. Select the checkbox to receive the mail from this mailing list. The emails will be sent to the e-mail address specified in the Account section. You can choose to receive a notification for offline Players. Choose whether to receive a notification through e-mail or text and after what delay time.
Note
The text message service is a paid subscription service! E-mail is free.
Administration#
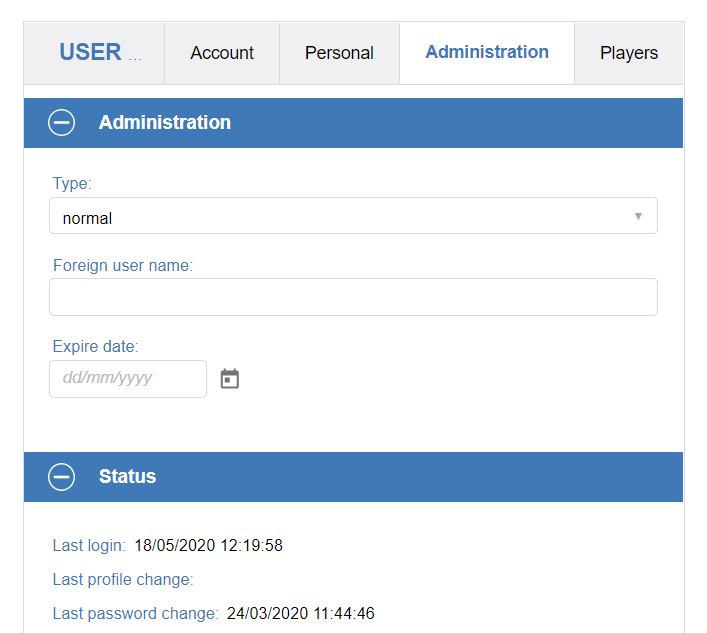
In the Administration tab, you will be able to change the User Type and Foreign user name. To select an Expire date, click on the calendar icon, then choose the desired date. Once an account has expired, the User will not be able to login. You can see the Last login, Last profile change, and Last password change.
Players#
Go to the Players tab to select the Players you wish to assign or remove for the User.
Note
You can also view and assign the Users per Player in the Player settings.
Managing users#
To remove a User(s), select the User(s) and click on the Delete button.
Warning
When a User is deleted, the associated private Library folder will also be deleted. Make sure that no files from this folder are being used before deleting the User.
To edit a User’s profile and settings, click on the User’s name.
User groups#
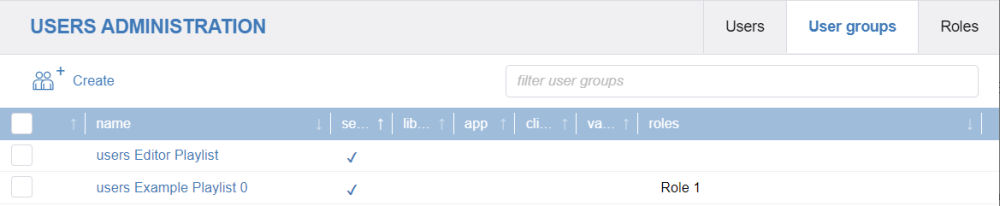
Go to the menu Users and open the User groups tab. An overview of all User groups is displayed. Use the search field Filter User groups to easily find a User group by name.
Creating User groups#
To create a new group, click on the Create button. The Create User group window appears.
User group settings#
General#
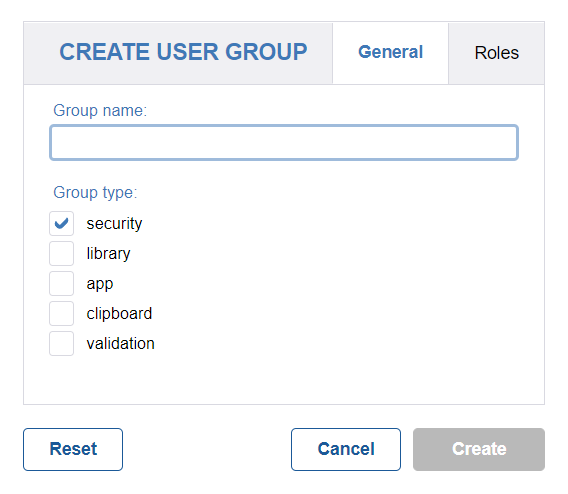
Fill in the group name and select a group type.
There are five different types of groups:
Security: able to set read-write rights to a Playlist or a Playlist page.
Library: able to create Shared folders in the Library. Only Users connected to this group will be able to access this folder. Select the Write rights checkbox to enable Users to upload and delete media in this folder.
App: able to create folders in the apps tab. Only Users connected to this group will be able to access this folder (this way you can prevent specific Users from using specific apps/templates). Select the Write rights checkbox to enable Users to create Editor templates in this folder.
Clipboard: able to create folders in the clipboard. Only Users connected to this group will be able to access this folder. Select the Write rights checkbox to enable Users to drop and delete clipboard pages in this folder.
Validation: able to assign validators to a Playlist.
Note
It is possible to create a group with a combination of these types. For example: Library + clipboard.
Roles#
Open the Roles tab when editing the User group and select the Roles you wish to add or remove from the group by flagging the checkboxes.
For some types of groups, it is also possible to give Write rights, you have to do this in the Role itself.
Managing user groups#
To remove a group(s), select the group(s) and click on the Delete button.
Warning
If you delete a Library/Clipboard group, the folders and their contents will be deleted as well!
To edit a group, click on the name of the group.
Roles#
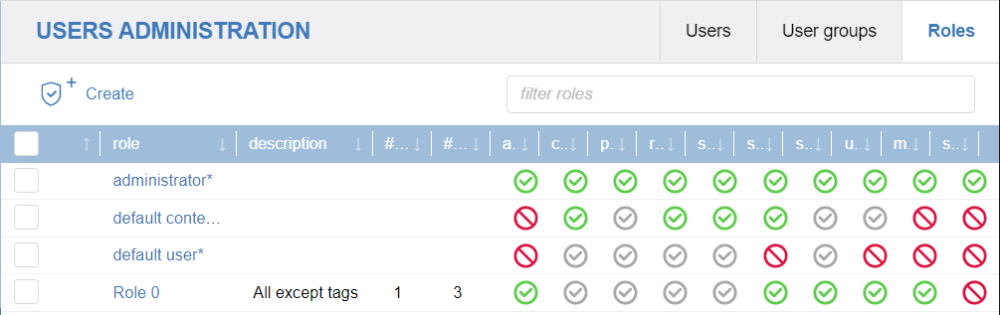
Go to the menu Users and open the Roles tab to manage Roles. A Role defines a set of permissions that allow or restrict Users from accessing certain modules or prevent them from executing certain actions in Centoview.
Creating roles#
To create a new Role, simply click on the Create button at the top left corner of the screen.
The Create Role pop-up will appear. Enter a Role name and optionally a description. Click on the Create button. When this window closes, the new Role is added to the Roles overview.
Note
You can create new Roles based on an existing Role. Click on the Copy Role icon and select a Role from the drop-down list. Permissions and assigned groups from the existing Role are copied to the new Role that you want to create.
Role settings#
Click on the name of the Role that you want to edit. The Role settings window will open. You can change the name, description, assigned permissions, and assigned User groups.
General#
In the General tab, you will see an overview of the assigned Users.
Note
Administrator, Default content manager, and Default User are protected Roles. You cannot rename these Roles or change the permissions, but you can change the assigned User groups.
Permissions#
Open the Permissions tab and allow or deny various permissions. Permissions are divided into different categories.
Click on the allow or deny icon to enable or disable various permissions. You can activate Full access if you want to change all permissions of the category at once.
Warning
Users with the Role ‘Administrator’ will automatically have access to all security, Library, apps, and clipboard groups so you do not have to explicitly assign these groups to that Role. However, administrators are not automatically assigned to validation groups. If you want to set the administrator as a validator of a Playlist, you must assign the validation groups to the Role.
User groups#
Open the User groups tab to assign User groups to the Role. This will give Users access to the selected User groups.
Note
You can also assign Roles per User group. Go to the menu Users – User groups.
Managing roles#
An overview of the Roles is displayed with the name and descriptions. The Members column indicates the number of assigned Users. The various categories (administration, content, Player, report, Scheduling, social media, User, meeting, and system) are marked with an icon, so you can see the allowed permissions per category at a glance.
Permissions are displayed with an icon to indicate whether they are allowed or denied:
Full access: all permissions in the category are granted.
Limited access: some permissions are granted, but not all.
Access denied: none of the permissions are granted.
Select a Role(s) and click on the Delete button to delete the Role(s).
Note
Administrator, Default content manager, and Default User are protected Roles and cannot be deleted.
Role permissions#
A role contains different sets of permissions that are divided into different categories:
Administration: permissions concerning customer settings.
Content: permissions concerning Player content.
Meetings: permissions concerning Google Calendar.
Players: permissions concerning the Player.
Reporting: permissions that allow Users to view and generate reports.
Scheduling: permissions that allow Users to Schedule content on Players.
Social media: permissions that allow Users to manage social media feeds (RSS feeds and Twitter).
Support: permissions concerning support tickets, remote support, and access to the Centoview manual.
Users: permissions concerning Users.
System: permissions that allow Users to be system administrators.
Depending on the allowed or denied permissions, Centoview will adjust itself and only show the items that the logged-in User has access to.
User groups#
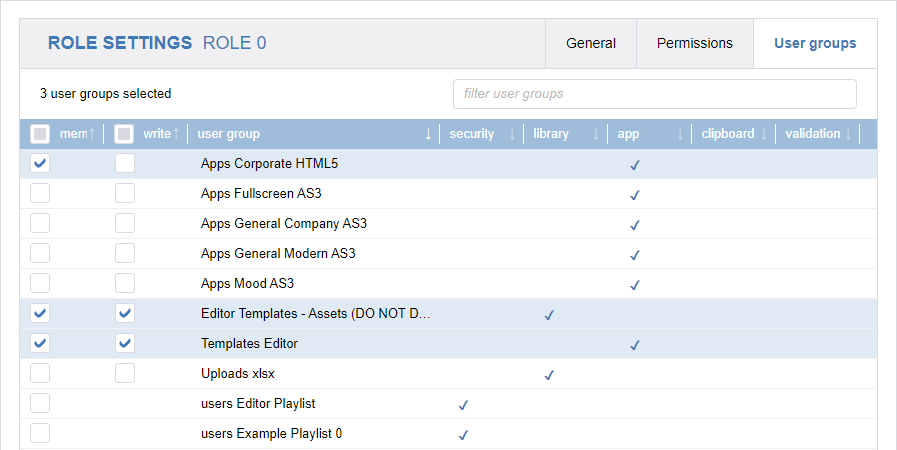
Open the User groups tab when editing a role and select the User groups you wish to add or remove from the role by flagging the checkboxes.
Note
For some types of groups, it is also possible to give Write rights.