Player Management#
Player groups#
Go to the menu Players and open the Player groups tab.
Player groups are used to assign a Player to a Playlist. When a Player group is assigned to a Playlist, the Playlist content is generated for the Players in this group.
Note
As a rule, we advise you to create one Player group per Playlist.
Creating a Player group#
To create a Player group:
Click on the Create button.
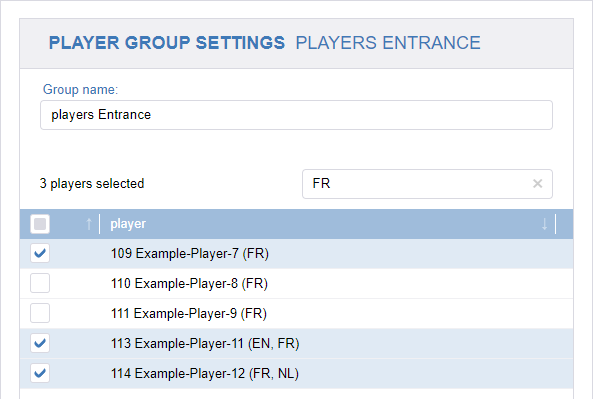
Provide a name for your Player group.
Give it the same name as your new Playlist.
Add “Players” to the beginning of the name. (For example: Players Entrance.)
Select all the Players that you wish to assign to the group.
Alternatively, you can skip this step and add the Players after the group is created.
Click on the Create button.
The Player group will be saved and added to the list of Player groups.
Managing a Player group#
To edit a Player group, click on the name of this group. You can change the name of the Player group, add Players to the group, or remove Players from the group.
Filter Players: Use this search field to easily find the Player(s) by name that you wish to select. Type in (a part of) the Player name.
Warning
When saving the Player group, the system will take the current filter into account. Don’t forget to empty the filter before saving the Player group.
Players#
Place & Play CMS supports Place & Play displays as well as hardware-based players that are used with LCD and LED displays. This guide is primarily focused on Place & Play displays based on E Ink technology. For LCD and LED displays please reach out to support@visionect.com.
Place & Play Display Registration#
Note
In these instructions, we use the terms Player and Place & Play display interchangeably.
Please first follow the instructions for the initial configuration of the Place & Play display here.
Once your device has been successfully configured for the Place & Play CMS it will show a PIN code. This PIN code is mandatory to register the display in the CMS. It may take up to 15 minutes for the code to show up after successful configuration.
To add the Place & Play display to your CMS account go to Players and select Add Player. In the pop-up window follow these steps:
Enter the name of the player. Choose something descriptive as this device will be referred to by this name elsewhere in the CMS. Example: “Entrance”
Set the time zone for this particular player. It is important to set the correct time zone as it is used to calculate the play times. The default time zone is GMT+1.
Type in the PIN code that is displayed on your Place & Play display
Click on Register Player.
When the player is registered it will display a blank screen with status notes on the bottom of the display. Now we can adjust its settings, add it to a group, and then assign a playlist.
Note
It is important to assign the new Player to a group so that the Place & Play specific functionality will be enabled and applied to it.
Player settings#
Click on the name of a Player to open the Player settings.
General#
Languages: This indicates in which language the content can be displayed on the screen. The content will be filtered so that only the items for the corresponding language(s) will be shown.
Logo: when set, the logo will be displayed on the screen via the “show logo” checkbox on the page(s).
Location: setting location (City, Country, Post Code) is important when Weather or other location-based widgets are used in playlists.
Groups#
Assign the Player to one or multiple Player groups by selecting the checkbox(es).
Users#
Assign Users to the Player by selecting the checkbox(es). These Users will now have rights to this Player. This means that the Users will be able to see the Player and modify the settings. Which settings they are allowed to modify, depends on the permissions in their role.
Note
You don’t have to select the Users that have the permission “access to all Players” in their role.
Advanced#
Proof of play: enable proof of play logging by selecting this checkbox. The content that is played by the Player will be logged. To view these logs, you can open the Proof of play report.
Source detection: enable source detection by selecting this checkbox. Then select a source. When an external device is connected to this source, the screen will automatically switch sources.
Beacon: enable a beacon by selecting this checkbox. Then select the type of beacon.
NFC: enable NFC by selecting this checkbox. Then enter your URL.
Note
Proof of play is only available for the Player types Centodisplay and Centoplayer.
Note
Source detection, Beacon and NFC settings are only available if this is supported in the settings of the Player.
Parameters#
Use this tab to set the parameters needed by apps or scripts. This is customer-specific.
Overrule#
Set the overrule content to be displayed immediately. This (Virtual) Playlist will be displayed on the Player as soon as it contains an active page. The overrule (Virtual) Playlist will stop displaying once there are no active pages in the Playlist.
Local#
Configure the local content for the Player. When the Player has downloaded the local content, it will be possible to display the content by pressing the corresponding key combination that is assigned to that content.
Loop/interrupt#
Loop:
When enabled, the local content playlist will keep on looping until it is interrupted by:
a reboot of the player
a modification to the playlist
an overrule playlist
When disabled, the local content playlist will play once and then go back to the normal content.
Interrupt:
When enabled, the local content playlist will interrupt the current page.
When disabled, the local content will start playing when the current page is finished.
Note
Local content is only available for the Player types Halo, CentoPlayer, and Centodisplay.
Status#
A list of the status changes (disconnected/connected) of the Player and their corresponding time.
Toolbar#
Select multiple Players to see the advanced toolbar at the top of your page. Use this toolbar to adjust the settings of multiple Players at once.

Filter Players: use this search field to easily find a Player by name by typing in a part of the name.